Quick Installation Guide
How to activate you license and connect the system
Activate your qubeCLOUD account
Log into cloud to activate your license
Open Apple iOS appstore
Download your Controller app
Download your monitor app (and others)
Connect your monitor app with the controller
Confirm connection on monitor
Start your training scenario
Change values during the scenario
You can also visit our SKILLQUBE
online Academy
We provide a online course, which will teach you the most important functions of the qubeSERIES step by step including your first setup. Work through the course point by point to familiarise yourself with your equipment. We recommend taking the „Expert“ course after completing this course successfully.
Start with step-by-step instructions
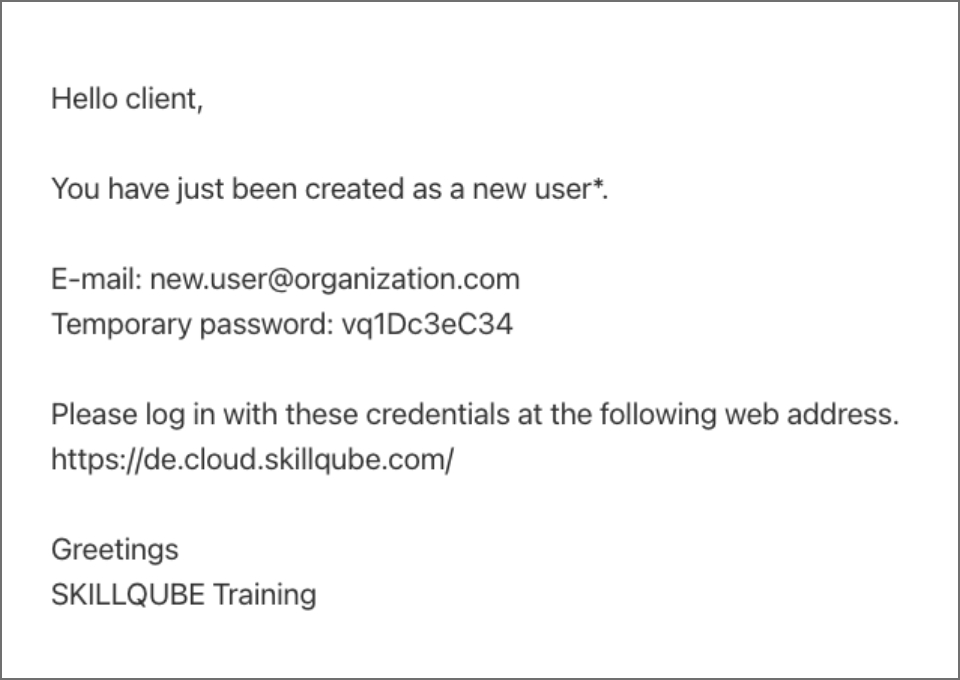
Activate your qubeCLOUD account
Please check your email inbox as we’ve sent you important account information to activate your cloud account and unlock its full potential.
Important note: You have to change the initial temporary password to be able to use the qubeSERIES for trainings.
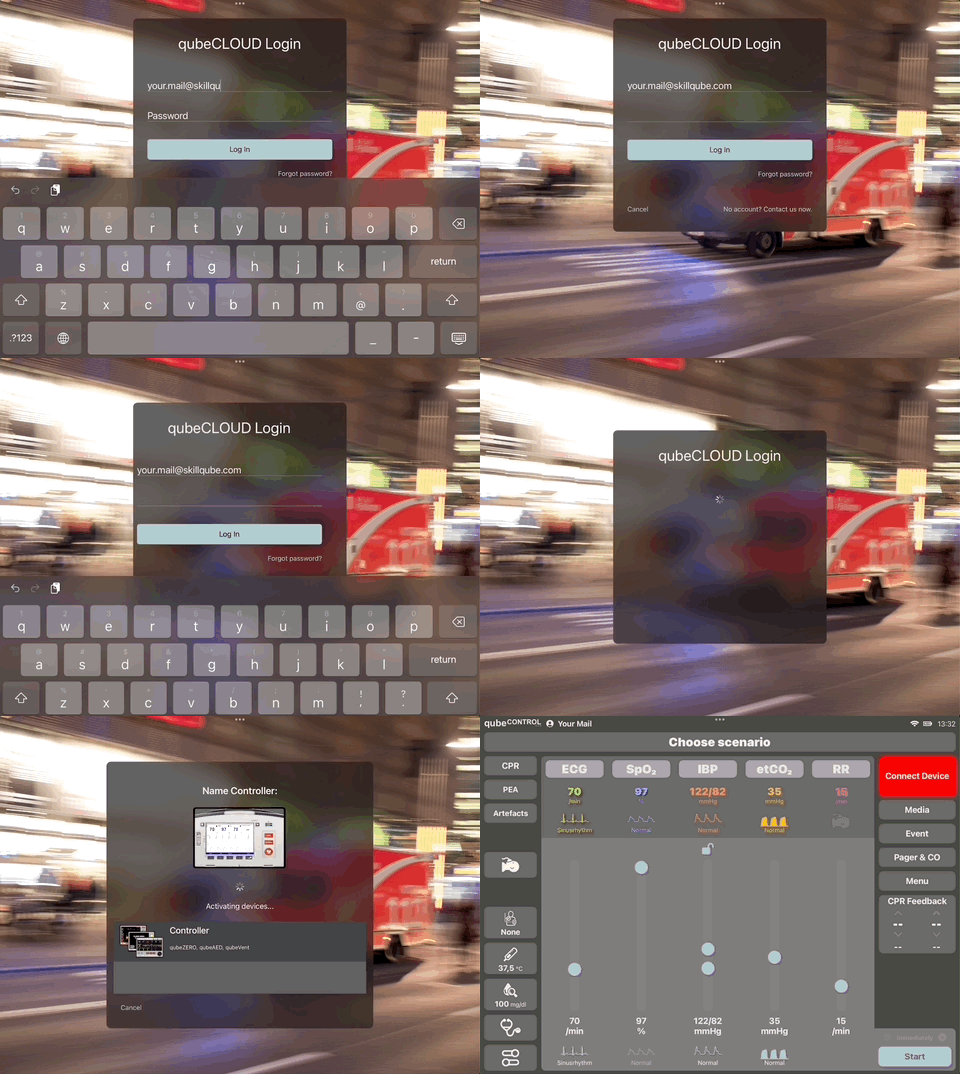
Log into cloud to activate your license
Change the initial password with a new password. The password has to be changed in order to enable the controller license.
Log into the cloud and activate the controller.
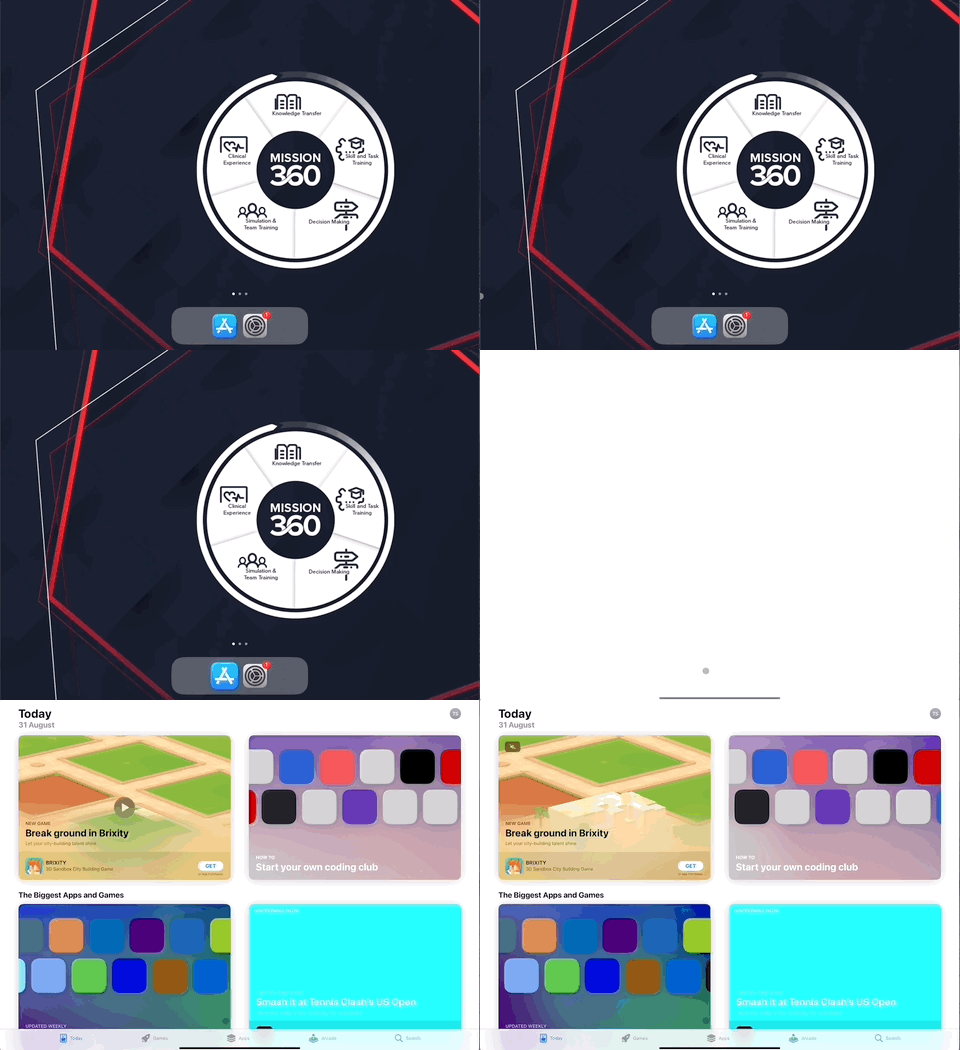
Open Apple iOS appstore
Start with the iPad on which you want to run the qubeCONTROL app.
Open the Apple iOS appstore.
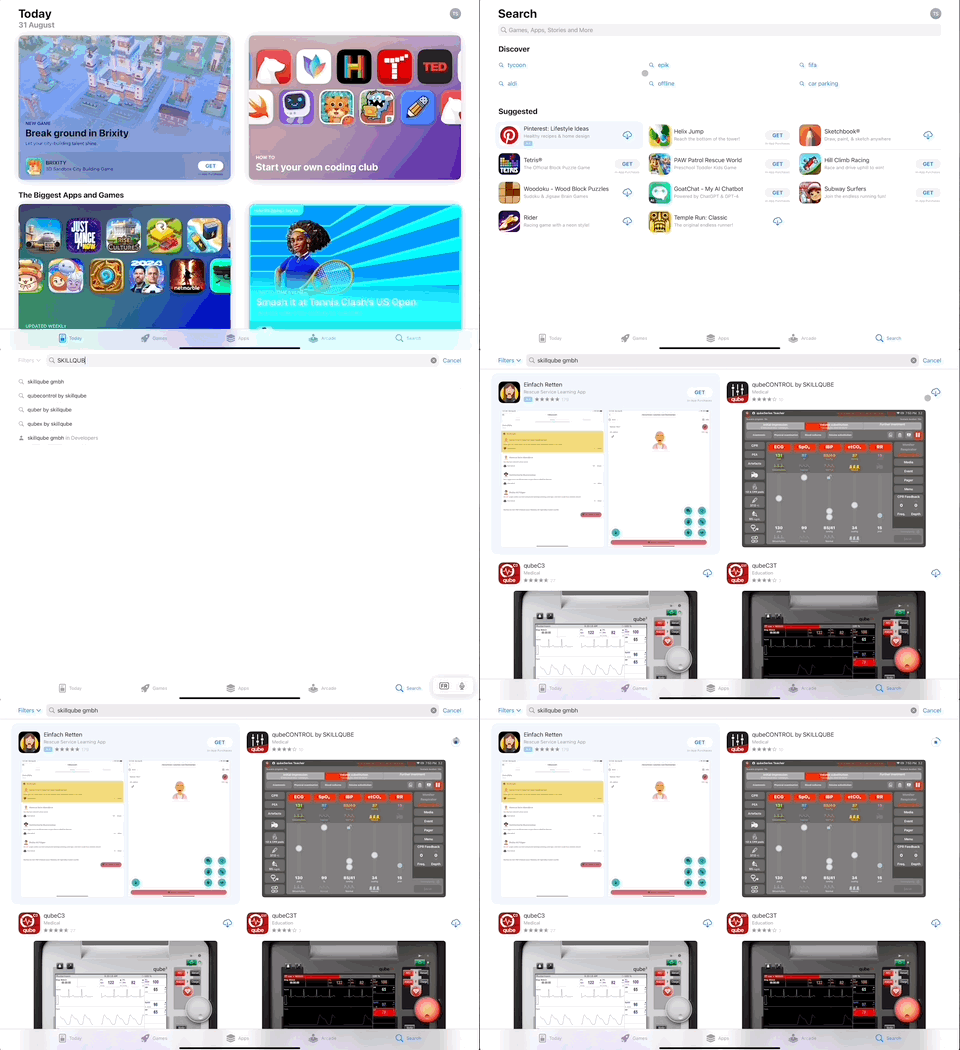
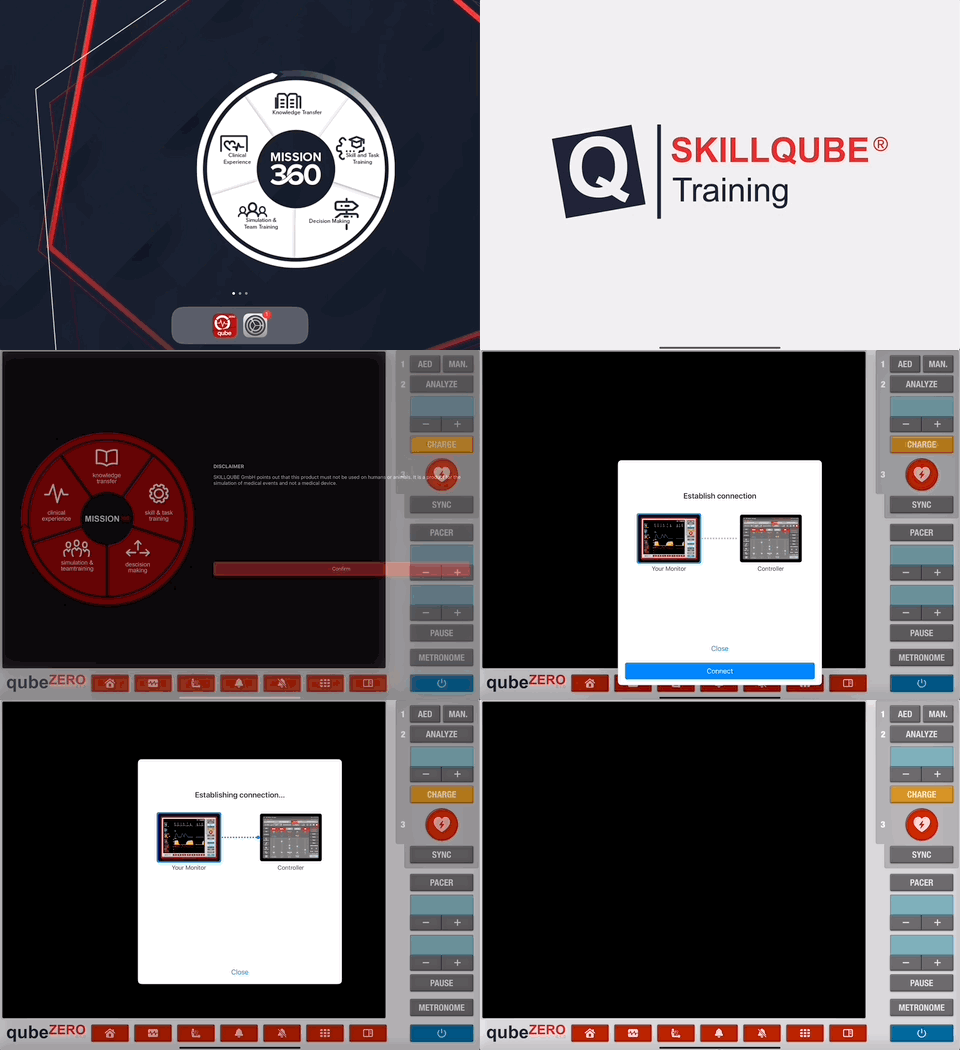
Download your monitor app (and others)
Redo the last two steps with your other iPads and install the your preferred monitor and ventilation apps on your devices.
Please ensure to install only apps which are included in your purchased bundle (qubeBASIC, qubeONE or qubeFIVE).
In every bundle you can use the generic SKILLQUBE apps qubeZERO, qubeVENT, qubeASSESS and qubeAED.
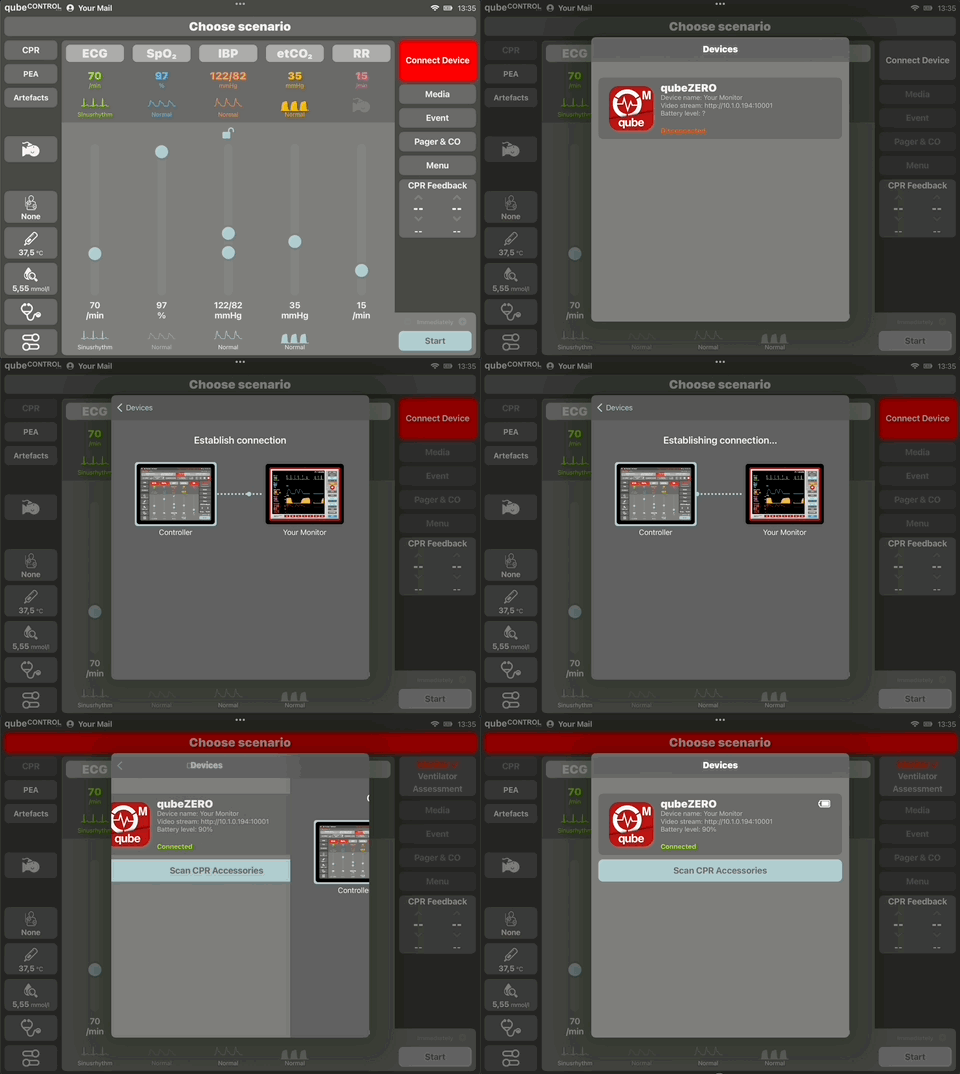
Connect your monitor app with the controller
Next you have to connect the monitor (eg. qubeZERO, qubeVENT, qubeX-Advance …) with your qubeCONTROLL controller app.

Confirm connection on monitor
Switch to the 2nd iPad and confirm the request for connection from the controller with your ECG monitor.
Important note: You are able to connect
1 x iPad with ECG patient monitor and
1 x iPad with a ventilation simulator and
1 x iPad with the assessment app
with the controller at once.
If you want to use a different premium monitor, you have the close the current monitor app and open the other one on you patient monitor iPad.
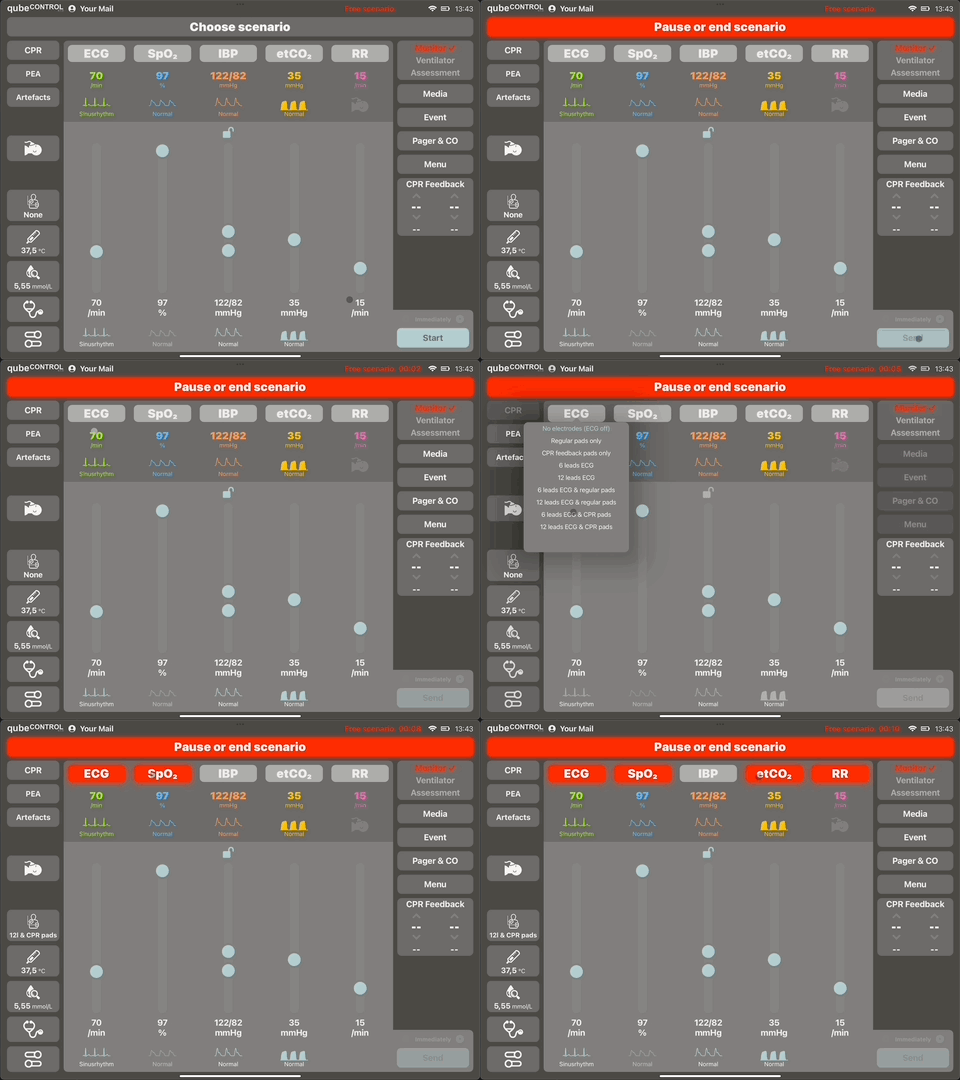
Start your training scenario
Open your controller app and start the scenario.
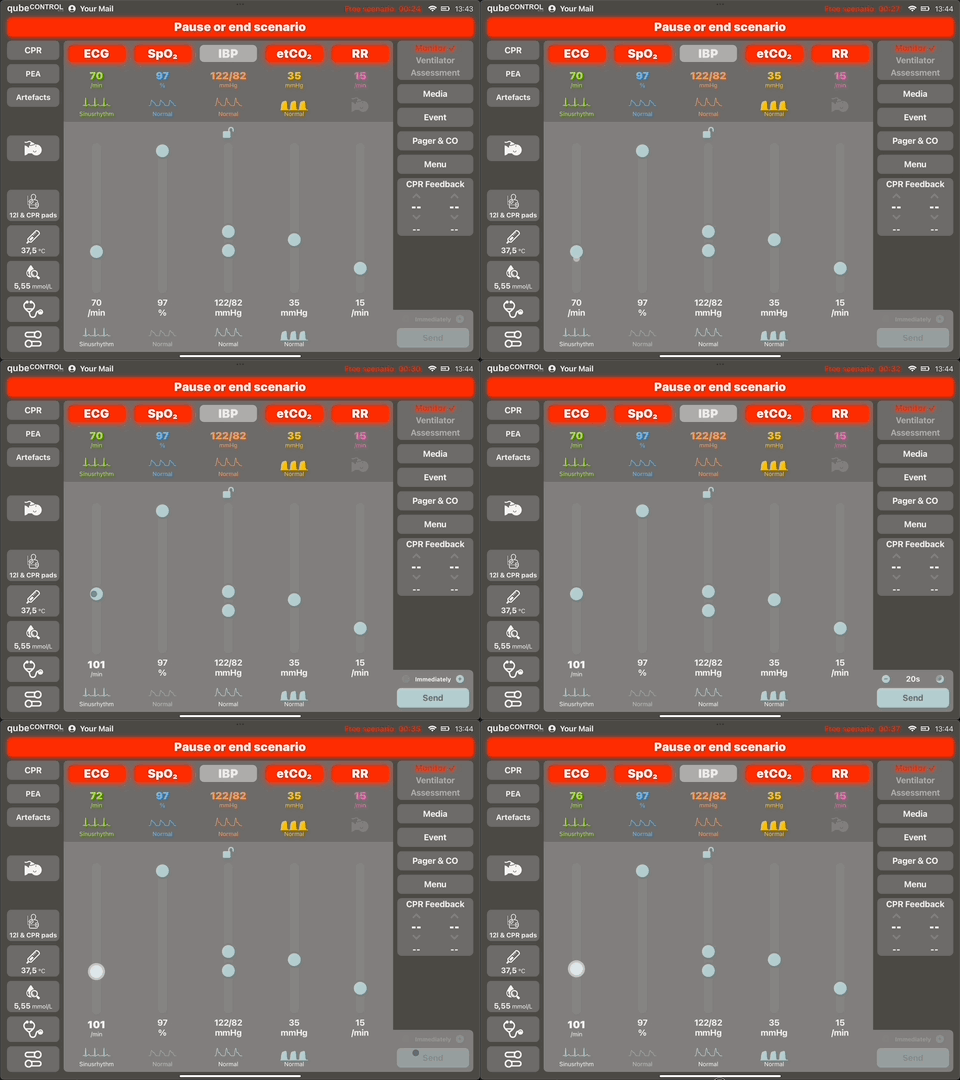
Change values during the scenario
Our intuitive user interface and sliders make it easy for the trainer to change the patient’s vital signs in real time on the connected monitor.

